How to Copy a Text Box in Word
You can add, copy, or delete text boxes in your Microsoft Office applications. A text box lets you add text anywhere in your file. For example, you can create pull quotes or sidebars that call attention to important information. For Word, see Add, copy, or remove a text box in Word.
Add a text box
To learn how to add a text box, select an application from the drop-down list.
-
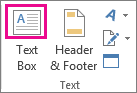
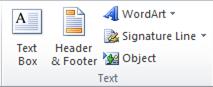
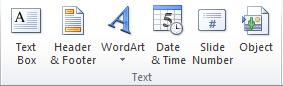
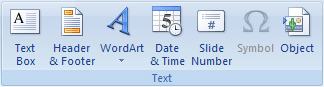
On the Insert tab, in the Text group, click Text Box.
-
In the worksheet, click and drag to draw the text box the size that you want.
-
To add text, click inside the box and type or paste your text.
Notes:
-
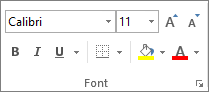
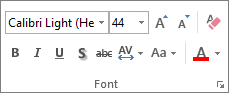
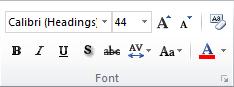
To format text in the text box, select the text, and then use the formatting options in the Font group on the Home tab.
-
To position the text box, click it, and then when the pointer becomes crossed arrows (
 ), drag the text box to a new location.
 -
You can also change or remove a border from a text box or shape.
-
Top of page
-
Click in the body of an open email message.
-
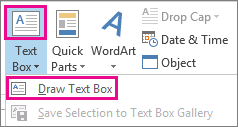
On the Insert tab, in the Text group, click Text Box, and then click Draw Text Box.
-
Click and drag in the message body to draw a text box the size that you want.
-
To add text, click inside the box and type or paste your text.
Notes:
-
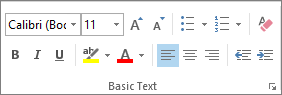
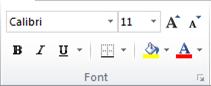
To format text in the text box, select the text, and then use the formatting options in the Basic Text group on the Message tab.
-
To position the text box, click it, and then when the pointer becomes a
, drag the text box to a new location. -
To control how text wraps around the box, click Layout Options
 , and then select an option from the list.
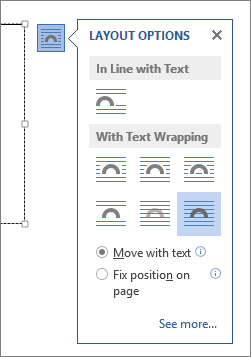
-
You can also change or remove a border from a text box or shape.
-
Top of page
-
On the Insert tab, in the Text group, click Text Box.
-
Click in the presentation, and then drag to draw the text box the size that you want.
-
To add text, click inside the box and type or your paste text.
If you aren't using a mouse
-
Press Alt+N to go to the Insert tab.
-
Use the arrow keys to move to the Text Box button.
-
Press Ctrl+Enter to add the text box to your slide, then type your text.
Notes:
-
To format text in the text box, select the text, and then use the formatting options in the Font group on the Home tab.
-
To position the text box, click it, and then when the pointer becomes a
, drag the text box to a new location. -
You can also change or remove a border from a text box or shape.
-
Top of page
-
In a project with a Gantt chart, click the Format tab and click Drawing.
-
Click Text Box, and then drag in the Gantt chart to draw the text box to the size you want.
-
To add text, click inside the box and type or paste your text.
Copy a text box
-
Click the border of the text box that you want to copy.
-
Press Ctrl+C.
Note:Make sure the pointer is on the border of the text box, not inside it. If the pointer is inside, pressing Ctrl+C will copy the text, not the text box.
-
Select a location and press Ctrl+V to paste the text box.
Delete a text box
-
Click the border of the text box that you want to delete, and then press Delete.
Note:Make sure the pointer is on the border of the text box and not inside it. If the pointer is inside the box, pressing Delete will delete the text inside the text box, not the box.
Add a text box
To learn how to add a text box, select an application from the drop-down list.
-
On the Insert tab, in the Text group, click Text Box.
-
Click in the worksheet, and then drag to draw the text box the size that you want.
-
To add text to a text box, click inside the text box, and then type or paste text.
Notes:
-
To format text in the text box, select the text, and then use the formatting options in the Font group on the Home tab.
-
To position the text box, click it, and then when the pointer becomes a
, drag the text box to a new location. -
You can also change or remove a text box or shape border.
-
Top of page
-
Click in the body of an open email message.
-
On the Insert tab, in the Text group, click Text Box, and then click Draw Text Box.
-
Click and drag in the message body to draw a text box the size that you want.
-
To add text, click inside the box and type or paste your text.
Notes:
-
To format text in the text box, select the text, and then use the formatting options in the Basic Text group on the Message tab.
-
To position the text box, click it, and then when the pointer becomes a
, drag the text box to a new location. -
To control how text wraps around the box, click Layout Options
, and then select an option from the list. -
You can also change or remove a border from a text box or shape.
-
Top of page
-
On the Insert tab, in the Text group, click Text Box.
-
Click in the presentation, and then drag to draw the text box the size that you want.
-
To add text to a text box, click inside the text box, and then type or paste text.
Notes:
-
To format text in the text box, select the text, and then use the formatting options in the Font group on the Home tab.
-
To position the text box, click it, and then when the pointer becomes a
, drag the text box to a new location. -
You can also change or remove a text box or shape border.
-
Top of page
Copy a text box
-
Click the border of the text box that you want to copy.
-
On the Home tab, in the Clipboard group, click Copy
 .
.Make sure that the pointer is not inside the text box, but rather on the border of the text box. If the pointer is not on the border, pressing Copy will copy the text inside the text box and not the text box.
-
On the Home tab, in the Clipboard group, click Paste.

Delete a text box
-
Click the border of the text box that you want to delete, and then press DELETE.
Make sure that the pointer is not inside the text box, but rather on the border of the text box. If the pointer is not on the border, pressing DELETE will delete the text inside the text box and not the text box.
Add a text box
To learn how to add a text box, select an application from the drop-down list.
-
On the Insert tab, in the Text group, click Text Box.
-
Click in the worksheet, and then drag to draw the text box the size that you want.
-
To add text to a text box, click inside the text box, and then type or paste text.
Top of page
-
In an e-mail message, on the Insert tab, in the Text group, click Text Box, and then click Draw Text Box.
-
Click in the e-mail message, and then drag to draw the text box the size that you want.
-
To add text to a text box, click inside the text box, and then type or paste text.
Notes:
-
To format text in the text box, use the formatting options in the Font group on the Format Text tab.

-
To position the text box, click it, and then when the pointer becomes a
, drag the text box to a new location. -
You can change or remove a border from a text box or shape or add a fill or effect to a shape or text box.
-
If you have drawn multiple text boxes, you can link them together so that text will flow from one box to another. Click one of the text boxes and then under Text Box Tools, on the Format tab, in the Text group, click Create Link.

-
Top of page
-
On the Insert tab, in the Text group, click Text Box.
-
Click in the presentation, and then drag to draw the text box the size that you want.
-
To add text to a text box, click inside the text box, and then type or paste text.
Top of page
Copy a text box
-
Click the border of the text box that you want to copy.
-
Right-click and select Copy from the menu.
Make sure that the pointer is not inside the text box, but rather on the border of the text box. If the pointer is not on the border, pressing Copy will copy the text inside the text box and not the text box.
-
Place your cursor where you want the copied text box to be, right-click, and then click Paste.
Delete a text box
-
Click the border of the text box that you want to delete, and then press DELETE.
Make sure that the pointer is not inside the text box, but rather on the border of the text box. If the pointer is not on the border, pressing DELETE will delete the text inside the text box and not the text box.
-
To delete multiple check boxes at the same time, hold down CTRL, and click the border of each text box in turn, and then press DELETE.
-
To delete a text box but save the text inside it, select the text inside the text box, and then press CTRL+C to copy the text onto the clipboard before you delete the text box.
How to Copy a Text Box in Word
Source: https://support.microsoft.com/en-us/office/add-copy-or-delete-a-text-box-4d968daa-5c86-48f2-88fa-b65871966017